The project started easily enough when we were gathering firewood in the mountains here in Colorado. I came across a log and instead of cutting it into the standard firewood length wondered if I could cut it the length of the log which was about 8' in length. Propping it on two logs that had already been cut to shorter lengths I took the chainsaw to one end and started the cut. I knew the challenge would be trying to get as straight a cut as possible but taking my time I worked the saw as gently and in as straight a line as I could down the length of the log. When the two halves came apart it looked like we had the beginning of a fireplace mantle though several (o.k., lots of) hours of debarking, planning, and sanding still lay ahead. Little did I know that cutting the log in half was likely to be the easiest part of the project.
Back at home in Denver I worked up the nerve to take apart the original mantle that had been installed when the house was built. I had tried to research on the internet what I was getting into and how exactly to take the mantle off but hadn't found much of any help. Eventually with the help of a couple of regular screwdrivers and a crowbar I was able to gently pry the old mantle (which turned out to be a hollow box) from the wall. This exercise also caused several holes in the drywall from the screwdrivers and crowbar poking through here and there but I wasn't too concerned as the area would soon be covered with river rock.
What I had also not discovered on the internet was how to attach the two logs which would support the actual log mantle, which I'll refer to as stanchions, into the wall. I knew I wanted them secured to studs in the wall so using a stud finder I drew lines on the wall as I mapped the stud locations. Being new to the fine art of stanchion installation I had hopes of having to cut relatively small holes in the drywall. That was not to be as I quickly realized that I would have to cut out enough drywall to be able to not only insert the stanchions but then have enough room to ratchet the bolts that would hold them to the preexisting studs. That turned out to be about the distance to the next stud (about 15 1/2 inches).
I had cut and sanded two logs into about 2' lengths that were to be the stanchions. I cut them a little longer than needed as I planned to trim them to fit after the river rock and mantle were installed. Using a reciprocating saw and a 12" blade I then cut a notch at one end of the log deep enough to match the depth of the stud it was going to be attached to (about 3 1/2"). After drilling the appropriate holes through the log and into the stud (these holes were smaller in diameter than the lag bolts I would use to mount the logs) I then bolted the logs to their studs. Now I had two stanchions installed and two big rectangular holes in my drywall. These holes were to the side of where the river rock would extend to so I knew I had some drywall patchwork to do.
The next step to tackle was the river rock. Again the internet was somewhat lacking in terms of detailed instructions so I went down to my two neighborhood big box home improvement stores (Lowes and Home Depot) to see what they offered in terms of useful advice. Home Depot ended up having some manufactured stone in the river rock pattern that was agreeable to my wife, but were somewhat short in terms of in-store know-how regarding installation, especially for an interior, over drywall, application. Finally the Internet turned out be be helpful as I visited the manufacturer's website. There I found detailed instructions on using the product for exterior applications, but didn't see anything for my application. I emailed the folks at Veneerstone to see if they could provide some insight into how to use their product for what I was trying to do. Thankfully they responded.
 In a nutshell, what we were about to do was pretty straightforward. First I would mark out the shape of the fireplace as we wanted it on the wall. Second was to put up, using a staple gun, plastic sheeting over the marked template of the fireplace. The plastic would stop the moisture from the cement from seeping into the drywall. With the plastic sheet installed we would then put up metal mesh again to the shape of the template on the wall. The mesh would hold the 1st coat of cement, the scratch coat, to the wall. I wanted to make sure the mesh was scurely anchored to the wall so I used drywall anchors and washers to attach it. Then the scratch coat of cement would go up. Its called scratch coat for good reason as the ridges from 'scratching' the cement would provide good surface adhesion for the next coat of cement which would hold the river rock. Once the scratch coat dried we would then use a second coat of cement to adhere the river rock to the wall. My wife anticipated this all taking several hours. I knew better and the above steps took about two weeks to complete.
We had bought the recommended quantity (6 boxes) of river rock. In our basement we used blue painter's tape to lay out the outline of the fireplace dimensions and then lay out the loose river rock to see if we really had enough (we did) and to also get a feel for how to arrange the rock so that it would have a random pattern feel on the wall. The Veneerstone boxes contained stones of varying sizes from quite bit to baseball diameter so it does give you flexibility in how you want it to look. Applying the river rock was easier than I anticipated. I had worried that with each stone we'd have to hold it in place for some amount of time before it would adhere but the scratch coat did its job and provided a good anchor foundation that seemed to readily hold the rock in place with just a little pushing and moving of the rock from side to side until it 'set' into place. Then it was just a matter of smoothing out the cement that oozed around the sides and blending it into the wall. Make sure to wear plastic gloves when using fingertips to smooth out the cement as the cement really will suck out the moisture from your skin. I should add that as we put up the river stone I did first apply a coat of cement directly over the scratch coat to get a smooth surface and then pushed the river rock with a coat of cement applied to the back of the stone into the coat I had just applied to the wall. That seemed to work well for us.


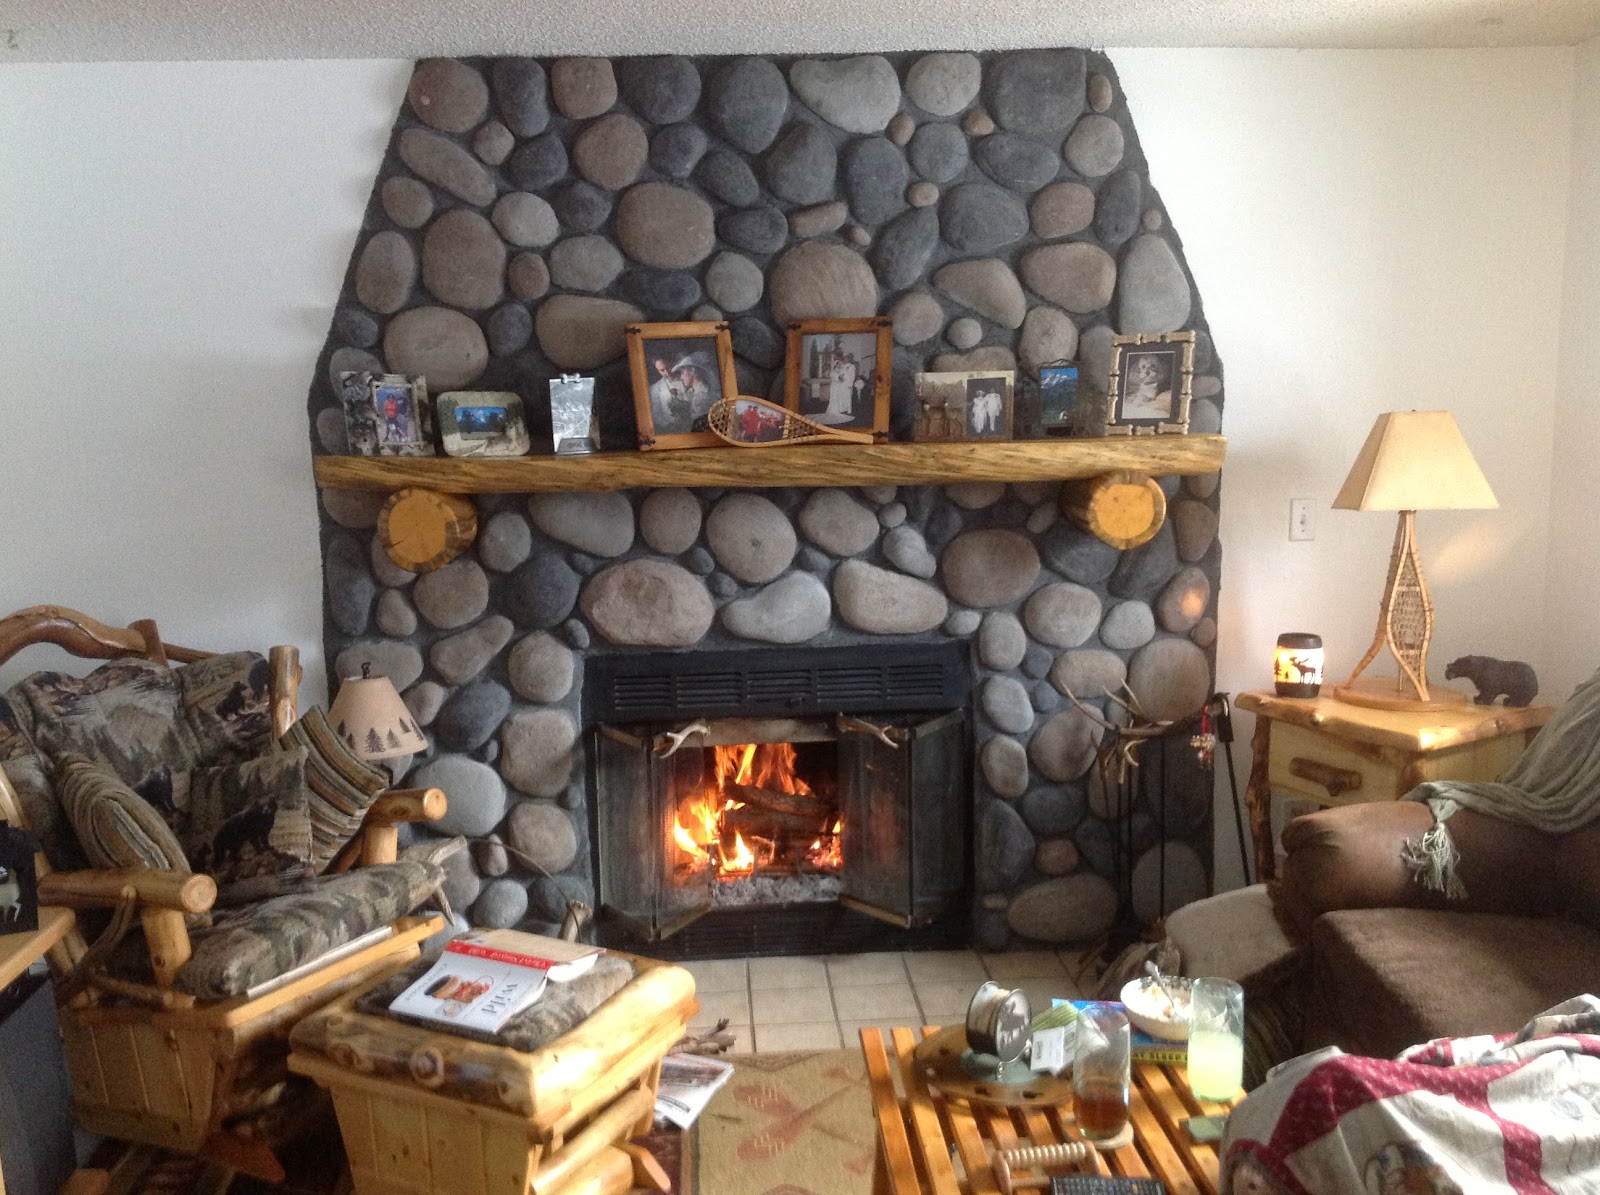
We had decided to finish the mantle and stanchions with regular spar varnish as we like the golden glow it gives to wood. We had put three coats on both the stanchions and mantle before bolting the mantle. The spar varnish really accented the blue stain (from the pine beetle which had killed the tree we used for the logs) in the pine. We have a rocker next to the fireplace made of aspen and its hard to tell the difference between the finished blue stain pine and the wood in the chair.
My wife, who had been a trooper as I made a complete mess of the house, was anxiously looking forward to being able to apply her finishing touches to the completed mantle. All that remained was to start a fire, heat up some hot chocolate, grab a good book, kick back on the couch, and watch as the January snow fell outside the window. While our finished project isn't quite the same as the fireplace that is the centerpiece of Old Faithful Lodge in Yellowstone we're happy with the new look in our family room. For more pictures of this project click here.